
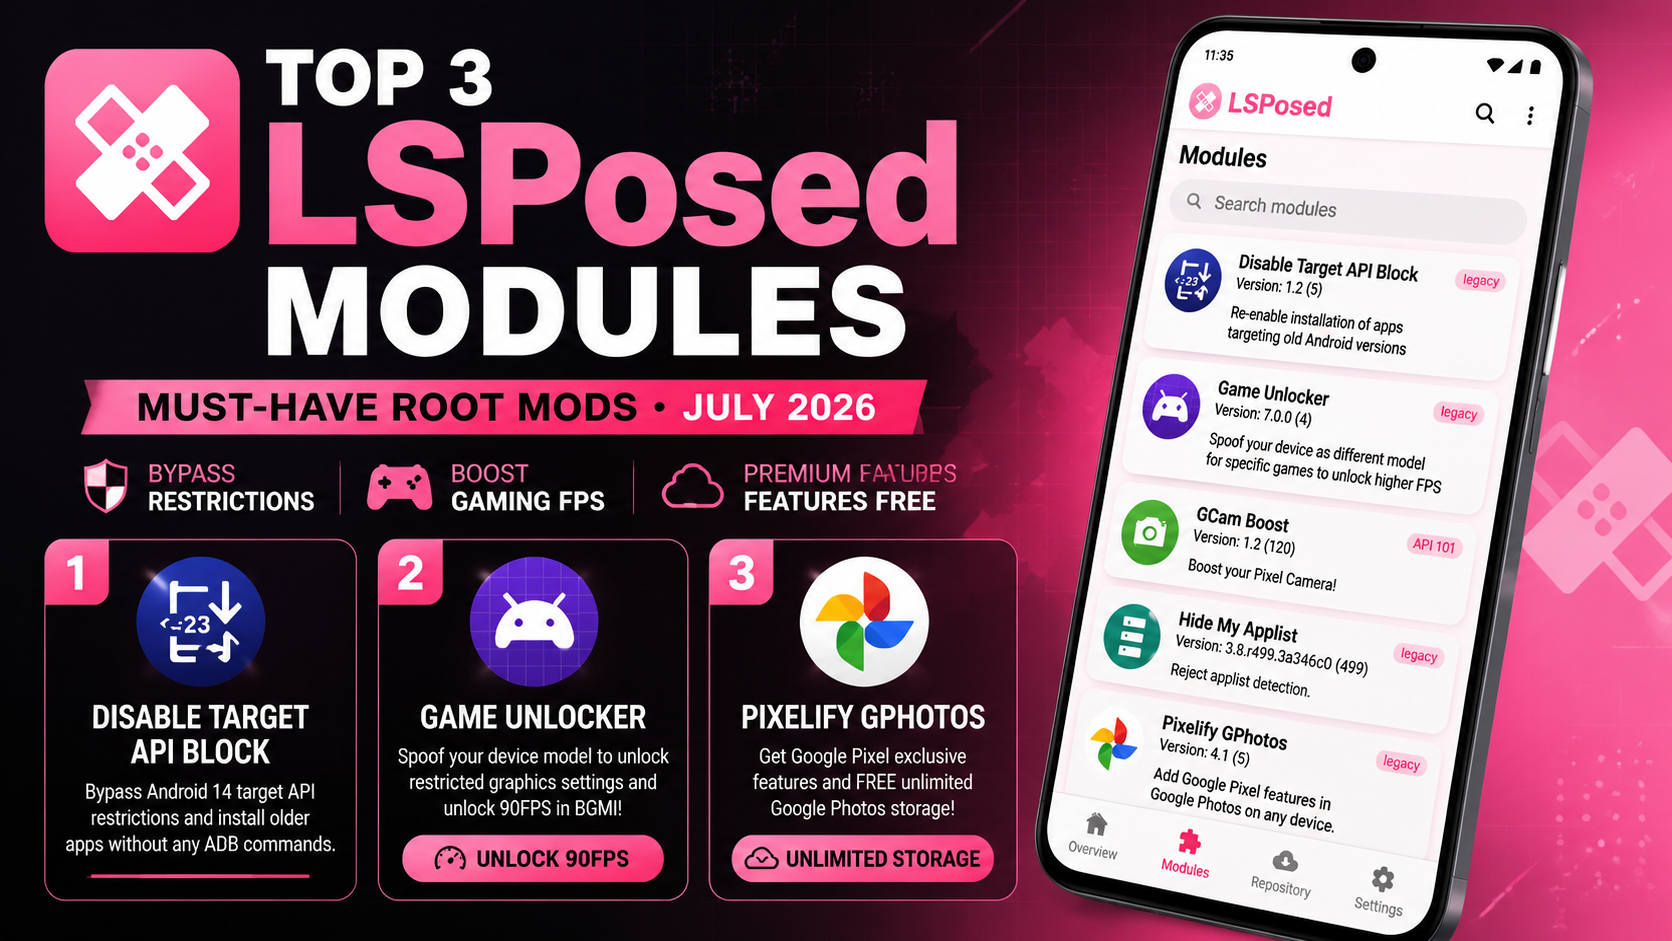
Hey everyone, it is Techynoob here! Welcome back to another deep dive into the incredible world of Android customization. If you are someone who loves to maximize the potential of your smartphone, tweaking it to run exactly the way you want, you are in the right place. It is July 2026, and the Android modification community has been delivering some absolutely fantastic tools. Today, I am going to walk you through my top three favorite LSPosed modules for this month. These tools have drastically improved my daily smartphone experience by restoring legacy app compatibility, optimizing gaming frame rates, and enabling exclusive software features.
Before we begin, ensure that your Android device is rooted with Magisk or KernelSU, and you have the LSPosed framework installed and running successfully. If you have all the prerequisites sorted, let us jump right into the top modules you need to try out.
Watch the full tutorial here on our Youtube channel:
1. Disable Target API Block (Legacy App Compatibility)
With the release of Android 14, the operating system introduced stricter installation guidelines, preventing users from directly installing older applications that target an API level lower than 23 (Android 6.0 Marshmallow). While this change improves overall software security standards, it can be incredibly frustrating if you rely on older utility apps or have custom backups that have not been updated by their developers. The "Disable Target API Block" module elegantly resolves this by adjusting the system's installation parameters, allowing you to seamlessly install your favorite legacy applications without dealing with complicated command-line tools.
Step-by-Step Installation:
- Open your LSPosed Manager application.
- Navigate to the Downloads tab or search for "Disable Target API Block" in your preferred module repository.
- Download the latest version and install the APK file.
- Return to the Modules section in LSPosed and enable the module.
- Check the box for System Framework to allow the module to function correctly.
- Reboot your device to apply the changes.
Why I use this module daily...
I have a few older productivity tools and offline utilities that I have used for years. The developers stopped updating them a long time ago, but they still work flawlessly for my workflow. This module ensures I can easily sideload these APKs whenever I switch devices or reset my phone, saving me a lot of time and frustration.
Battery impact and performance analysis...
The beauty of this tweak is its footprint. Since it only activates during the application installation process, it has absolutely zero impact on daily battery life or background performance. My device runs just as smoothly as it did before the installation.
Potential bugs and how I fixed them on my device...
Initially, I noticed that third-party app stores like F-Droid still showed older apps as incompatible. To fix this, I went back into the LSPosed Manager, enabled the module specifically for the F-Droid app in addition to the System Framework, and then cleared F-Droid's app cache in my phone settings. After a quick reboot, everything worked perfectly.
2. Game Unlocker (Performance Optimizer)
If you are a mobile gaming enthusiast, this next module is an absolute game-changer. Game Unlocker is designed to help you utilize the maximum hardware capabilities of your smartphone display and processor. Many modern games lock higher frame rates behind specific device models, even if your phone has the processing power to handle it. This module intelligently adjusts your device's profile for specific gaming applications, allowing you to select higher graphics and frame rate options, such as 90 FPS in popular titles.
Step-by-Step Installation:
- Download the Game Unlocker APK from its official GitHub repository.
- Install the application and open the LSPosed Manager.
- Head over to the Modules tab, locate Game Unlocker, and toggle it on.
- In the module's scope settings, select the specific games you want to optimize (for example, BGMI or other intensive games).
- Restart your smartphone to finalize the configuration.
- Open your game, head to the graphics settings, and enjoy the newly unlocked frame rate options!
Why I use this module daily...
Playing on a 90Hz or 120Hz display is a visual treat, but it feels wasted when a game artificially restricts you to 60 FPS. I use a Google Pixel 6, which is more than capable of handling higher frame rates. This module allows me to experience buttery-smooth gameplay, making competitive matches much more responsive and visually enjoyable.
Battery impact and performance analysis...
Pushing your phone to 90 FPS will naturally consume more battery compared to 60 FPS, as the GPU is working harder to render those extra frames. I did notice a slight increase in device temperature during extended gaming sessions. However, the overall performance remains incredibly stable, without any unexpected system lag.
Potential bugs and how I fixed them on my device...
When I first installed the module, the 90 FPS option did not appear in my game settings. I realized that the game had cached my previous device profile. I solved this by going into my phone's settings, navigating to the game's app info, and clearing the app cache (make sure not to clear user data!). Upon relaunching the game, the new graphics settings were available.
3. Pixelify GPhotos (Pixel Features Enabler)
Google Pixel devices come with a host of exclusive software perks, one of the most sought-after being optimized cloud backup options in Google Photos. Pixelify GPhotos is a brilliant module that brings these exclusive features to any Android device. It modifies how the Google Photos application recognizes your hardware, granting you access to Pixel-exclusive backup settings and photo management tools.
Step-by-Step Installation:
- Download the Pixelify GPhotos module from the Xposed repository or its official GitHub page.
- Install the module and open your LSPosed Manager.
- Go to the Modules list and enable Pixelify GPhotos.
- The system will prompt you to select the target applications. Make sure Google Photos is checked.
- Reboot your device.
- Before opening Google Photos, go to your phone's Settings > Apps > Google Photos, and tap "Force Stop." Clear the app cache for good measure.
- Open Google Photos, tap on your profile picture, and navigate to the backup settings to see your new options.
Why I use this module daily...
As someone who takes hundreds of photos and videos for the Techynoob blog, device storage fills up incredibly fast. This module has been a lifesaver, allowing me to efficiently manage my media backups directly through the native app without constantly worrying about my storage quotas filling up overnight.
Battery impact and performance analysis...
Since this module only alters a few recognition strings within a specific app, the battery impact is virtually non-existent. Background syncing works exactly as it normally would, and the application remains fast, responsive, and completely stable.
Potential bugs and how I fixed them on my device...
After a recent Google Photos app update from the Play Store, I noticed the module temporarily stopped applying the features. This happens occasionally when the app's internal database structure changes. To fix this, I simply downgraded the Google Photos app to the previous stable version and temporarily disabled auto-updates for it in the Play Store until the module's developer released a compatibility patch.
Final Thoughts
Customizing your Android device is all about making the hardware work best for your specific needs. These three LSPosed modules—Disable Target API Block, Game Unlocker, and Pixelify GPhotos—offer a perfect mix of utility, performance enhancement, and feature optimization. They are an excellent starting point for anyone looking to get the absolute most out of their rooted smartphone in 2026.
Have you tried any of these modules yet? Let me know your thoughts and your personal favorite Android tweaks down in the comments below. Stay tuned to Techynoob for more in-depth guides, tech reviews, and customization tips!
Step-by-Step Installation for Non-Rooted Devices
Subscribe to our YouTube channel for daily Android tips, tricks, and tutorials: TechyNoob
Discussion (0)
Post a Comment
No comments yet. Be the first to share your thoughts!